Behind the Scenes
Behind the Scenes: looking after family photos at home
Don’t neglect the ones you love- looking after family photos at home
We all love our family photos they provide us with so much; they refresh our memories, connect us to our past, make us smile and may even cause a tear to be shed. We know that to every one of us, they are precious.
In conservation terms the care for photographic collections is a vast and complex area, requiring knowledge about photographic process, the materials used to print the photographs and an understanding of the complex environmental conditions that can accelerate damage. Paper conservators tend to be the ones who, both through their training and working with collections, develop a strong familiarity with photographs and knowledge of what to.
A quick internet search will bring up lots of useful resources containing all the correct guidance useful for the conservator, archivist or heritage professional. However, it can be an overwhelming amount of information for someone who wants an idea of how to care for photographs at home.
So, here are five tips for looking after the family snaps that are loose in box and all mixed up.
- Handle with care
I can never say it enough, carefully handling will reduce the wear and tear on your photographs. The surface of a photograph is quite a delicate thing.
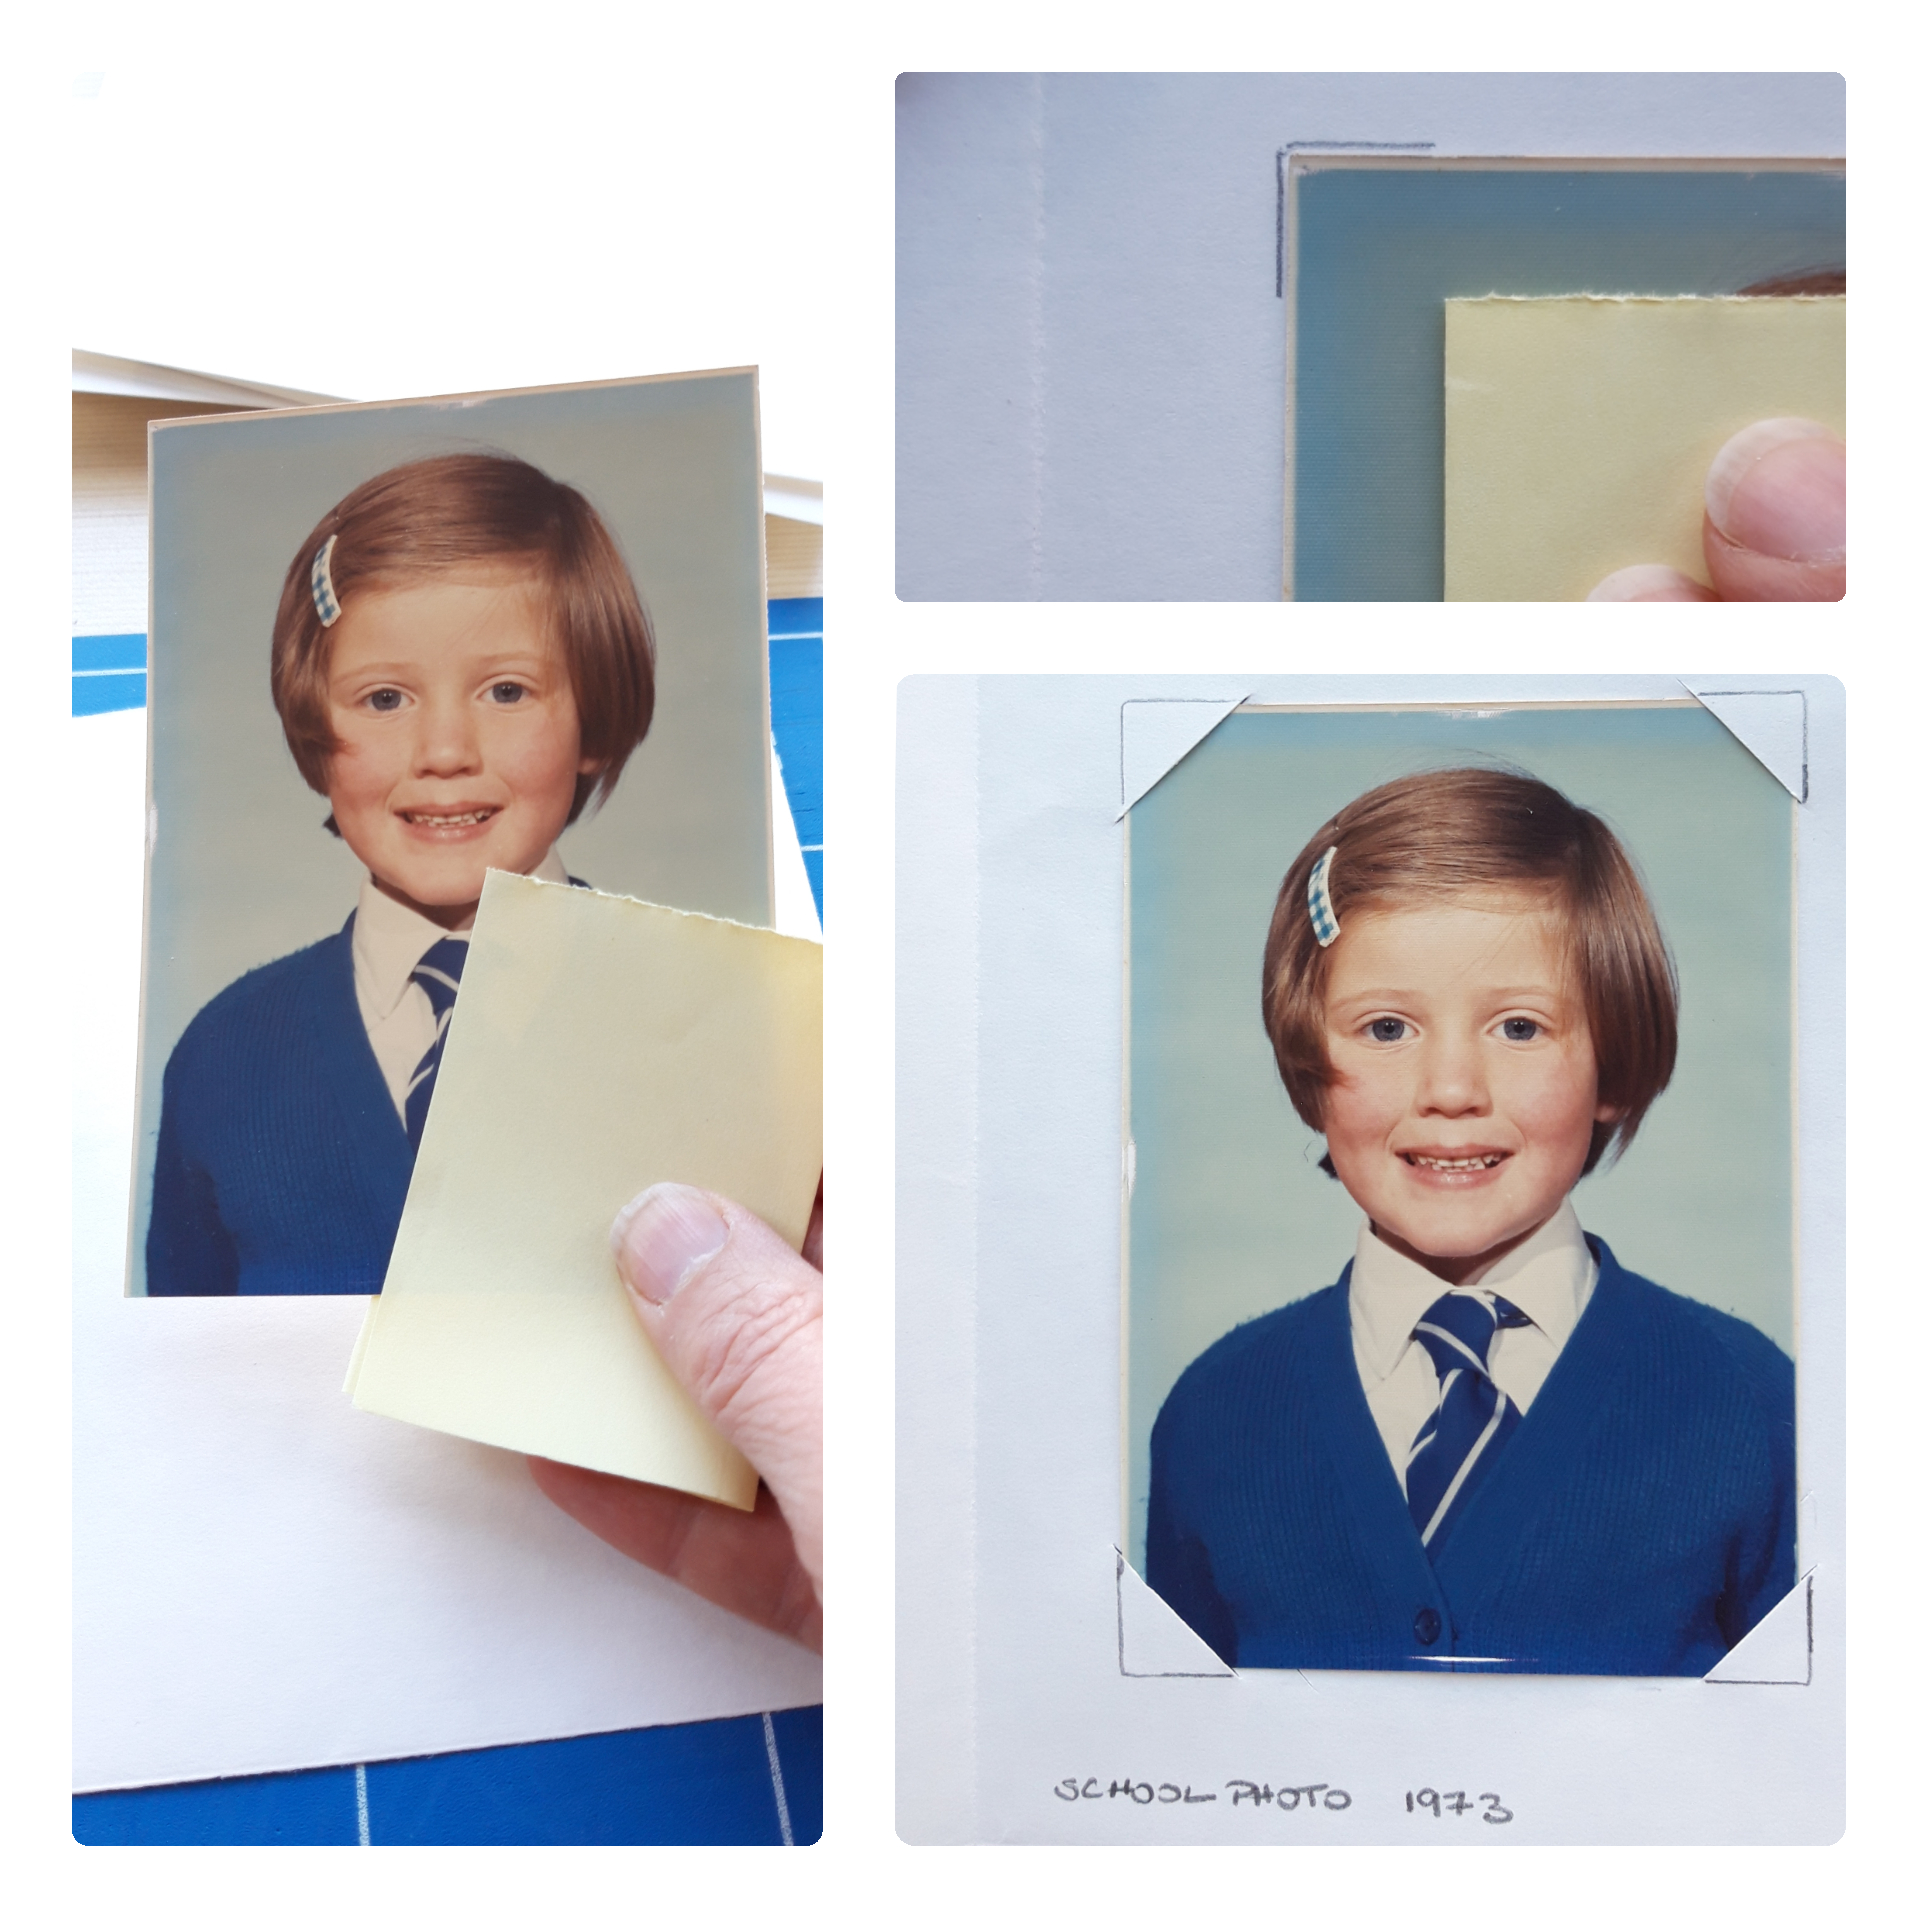
We all know that clean hands are essential to prevent dirt or staining as we sort through our photos. We can protect our photographs by wearing gloves, and by holding the photographs at the edge. You can also create a barrier between your fingers and the photograph with a small slip of folder paper. (see image)
Don’t fold photographs, when that happens, they crack along the emulsion image layer and as the top layer breaks and flakes away you are left with a gap and can see the paper underneath the photo.
- Who’s who, when and where?
My father was a great man for writing on the back of his photos in his spidery handwriting; to him he knew the value of dating and describing written inscriptions on the photos. Whilst is goes against all the best advice, which is not to write on photographs as it can cause damage to the photograph, he was doing us a favour. What is done is done, he started this habit long before I became a conservator! I did eventually manage to persuade him to write the details on a piece of paper and keep that with the photos, which worked equally as well.
- Get organised
Group the photographs by events and people. Sort pictures into events such as holidays, school events, weddings, and birthdays. Sort each pile by date. Organize each of your piles chronologically. You may need to do some guess work, but don’t worry it’s okay not to be perfect. Separate duplicates. Place duplicates in separate piles, do you really need two of them? Have you a relative who might appreciate a gift of one? Discard the out of focus photographs or the ones of feet and the floor- we all have some like that mixed in with the others.
- Pick what to digitize
Go through the piles, and identify the ones you want to scan; you might decided to start with the oldest photos or ones that you are having difficulty identifying – remember you can share the scanned image with other family members and puzzle things out together.
These days there are numerous apps available for smart phones and tablets, some better than others and so it can be a case of trial and error. Test the app with just a few photos, 5 or 6 that will give you a good enough idea of the results. Look for ones which have features such as automatic edge detection, perspective and that can reduce the glare.
Many photographers provide a digital restoration process which can give some excellent results; to clarify what they are doing, they will scan your damaged photograph and then using software will, digitally correct the fading, discolouration or areas of loss on the image. They will not and should not do anything to the original.
- Paper folders- no glue or sticky tape required
Here is an easy folder to use to store, support and protect your photos. If you can get acid free paper, do, if not and you are doing this as a way of sorting and organising your photographs before deciding on what photograph albums to purchase (I think talking about photo albums is a topic for another blog post) then any paper will do.
We know that paper storage provides physical support and protection for fragile objects, a simple paper folder will keep the photos separate from each other.
- Take a A4 sheet and fold in half, that A5 size folder will protect most standard sizes of family snaps.
- You can secure the photos by simply cutting little slits in the paper to make a paper corner- no glue is required to keep them from slipping out.
- Write on the paper who, when and what the picture details. If you haven’t room to write it underneath; write it on the top flap but do that before you put the photo inside!
- If you keep the paper folders the same size, they will sit in neat stacks in your box and the small ones won’t get lost.
Remember, you do not have to do everything at once, but maybe just take down that box of old photos from the top of the wardrobe and see who is there. It is a great way to spend a morning or afternoon!